Page Contents
Note: Not interested in the details and just want a free tool you can use to schedule Instagram posts right away? Click the button below.
[maxbutton id=”2″ ]
Uploading posts to Instagram is easy, but scheduling Instagram posts is a little more complicated.
For non-business Instagram accounts, there is still no official way to 1) upload your posts from your desktop, or 2) schedule your posts ahead of time 3) post a content to several accounts at a time.
Fortunately, with the help of the guide below, no matter what kind of Instagram account you have, you can start scheduling your posts for free in no-time.
First, it’s important to know why you need to schedule your Instagram posts in the first place.
9 reasons why you need to schedule Instagram posts:
1) Save time and manage your posts (and Stories) from your desktop
Uploading to Instagram from your phone is easy, but uploading to Instagram from your desktop, especially when you’re uploading posts that weren’t created on your phone, is easier. Without a desktop Instagram scheduler, when you upload a post not created with your phone, you first have to transfer the file from your camera to your desktop, and then transfer the file from your computer to your phone where you can then finally upload the post to Instagram. With a desktop Instagram scheduler like AiSchedul, you simply have to transfer the file to your computer and drag the file onto the scheduler. Not only is this faster than regularly uploading a post, but it’s also more convenient. AiSchedul supports the following formats:
- images
- videos
- albums (multi-photo and multi-video)
- reposts
2) Grow your Instagram faster
Daily posting is one of the fastest ways to grow your Instagram account. Take a look at the following infographic:
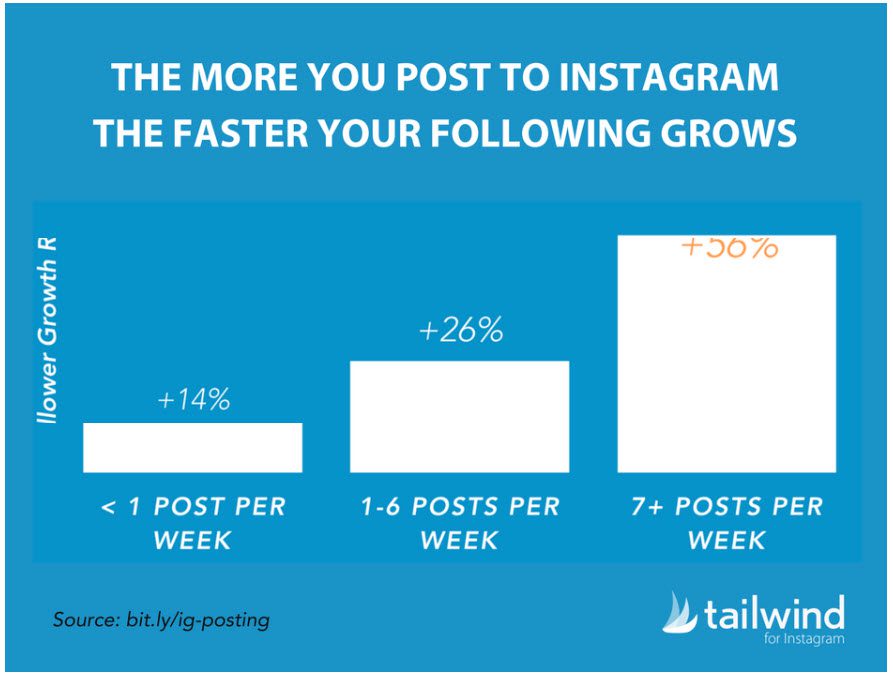
According to Tailwind, posting to Instagram daily gets you followers 4x faster than posting less than once a week When you schedule your posts ahead of time, you don’t have to worry about waking up and not knowing what to post, suffering from laziness, or having to always be connected to your Instagram. Everything is already taken care of.
3) Create higher quality posts
When you schedule your posts ahead of time, instead of having to quickly think of what to post every day when you wake up, you can take the time to think about what you want to post next week, or even next month. The more time you take to think of and create a post, the higher quality that post is going to be.
4) Find the best hashtags for your posts
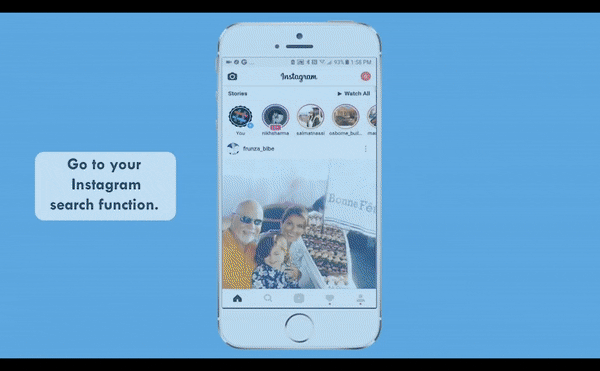
The main way that non-followers discover you on Instagram is hashtags. That’s why it’s so important to understand what hashtags likely-followers are using on Instagram. Here’s how to find out what hashtags you should be using:
- Think of three main keywords related to your Instagram page and search them on Instagram
- Go the “Tags” tab in the search results and write down all the major hashtags (more than 50,000 posts) that result from your search
- Explore each of these hashtags one-by-one and scroll horizontally across the related hashtags for more ideas
Or just watch the GIF below:
Or, you can use a dedicated hashtag research tool like the one offered by AiSchedul. When you search keywords related to your Instagram page, AiSchedul will show you the most popular hashtags related to your search in descending order. 
You can then select what hashtags you want to use (up to 20) and add them to your post with one click.
5) Create better captions
Captions should be as concise as possible, have all necessary information as close to the beginning of the caption as possible, and contain a clear Call-to-Action (CTA). Instagram schedulers like AiSchedul allow you to post your hashtags as a comment instead of inside your caption.

This frees up space to make your caption as clear and effective as possible.
6) Post across multiple Instagram accounts at the same time
If you run multiple Instagram accounts, you can use a scheduler to post the same post across multiple Instagram accounts simultaneously. This is especially useful if you are a business with different Instagram accounts for different branches of your business. For example, let’s say you’re a fitness apparel business with different Instagram accounts for different sports. If you were holding a promotion business-wide, you could schedule one post detailing the promotion across all of your Instagram accounts at the same time. This way, you don’t have to waste time uploading the same post to each Instagram account individually.
7) Make your Instagram flow better
Planning your posts ahead of time allows you to create and maintain a consistent visual theme to your Instagram account.

In the example above, Frank Body uses the same color scheme in the majority of its posts. You can plan to use the same color scheme, setting, shape, or any other characteristic in your posts that make your Instagram page distinctly you.
8) Enjoy more freedom
Without a scheduler, you have to worry about always being connected and having access to Instagram on a daily basis. This can make times when you are disconnected from Instagram, like vacation, more stressful than they should be. Scheduling your posts ahead of time gives you the freedom to disconnect from Instagram, go on vacation, and be as lazy as you want while still reaping the benfits of daily posting.
Now that you know the benefits of scheduling your Instagram posts, here’s
How to schedule Instagram posts right away:
Scheduling posts to your feed with AiSchedul:
1) Sign up for AiSchedul’s free Instagram scheduler.
2) Securely add your Instagram account.
Add your Instagram account by providing your login information.

That’s it! You’re ready to use AiSchedul. No download required.
After connecting your account, you will see your account on your dashboard.
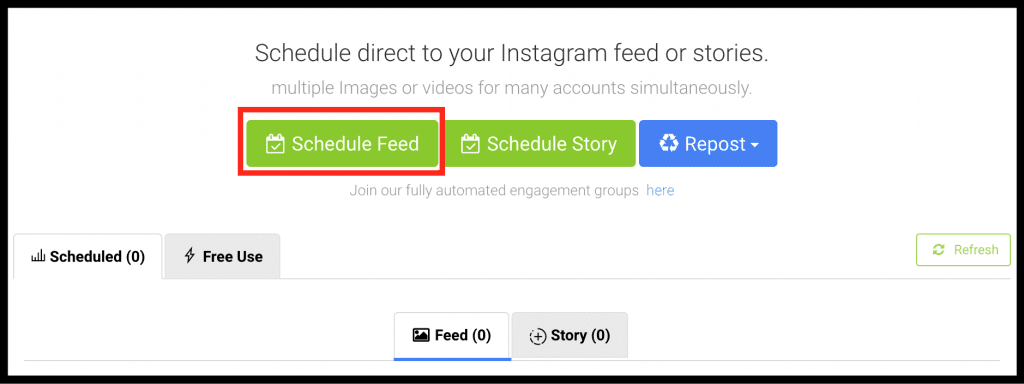
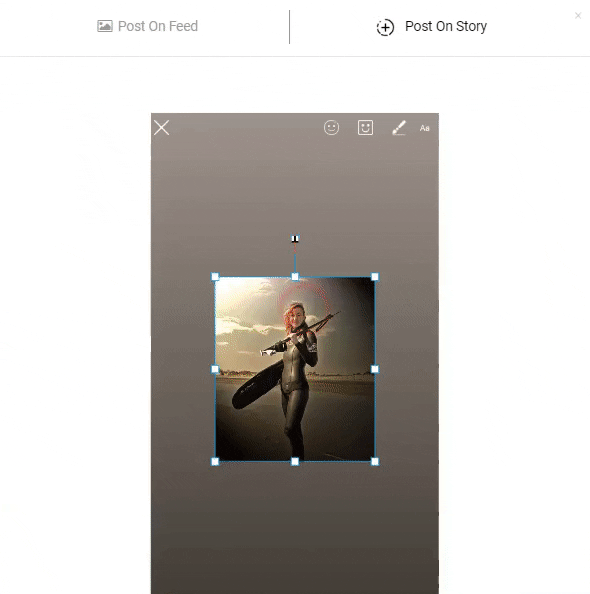
3) Click “Schedule Feed”.
4) Drag and drop your post into AiSchedul.
Afer clicking “Schedule Feed”, a new screen will pop up.

Add any image, video or album you want by dragging it into the rectangle at the top of the screen. You can upload up to 10 images or videos in a single post. Supported images formats are:
- jpg
- png
Supported video formats are:
- mp4
- WebM
- Ogg and the Image Formats are jpg, jpeg, png.
5) Write your caption.
In the first box, write your caption as you would on any regular Instagram post.

Like on your phone, you also have the option to add emojis to your caption.

6) Search and add your hashtags.
If you already know what hashtags you want to use in your posts, simply type them into the box under the title “Hashtags”.
If you don’t know what hashtags to use, or simply want to do more research to find the best possible hashtags for your post, you can use AiSchedul’s integrated hashtag research tool.

Just search a keyword related to your post and AiSchedul will display the most popular hashtags related to your keyword in descending order.
You can then easily add these hashtags to your post with one click.
Note: to keep your caption as clear and easy-to-read as possible, AiSchedul automatically posts your hashtags as the first comment on your post instead of inside of your caption.
7) Search and add your location.
Did you know that posts tagged with a location receive 79% more engagement than posts not tagged with a location? To add a location to your post with AiSchedul, first click the “Find Location” button.

Then simply search the location and choose the most relevant tag.

8) Choose a date and time for your post to be published.
You can either choose a specific date and time for your post to be published on Instagram, or you can choose to “Post immediately” by selecting the box.

You can also choose to automatically delete your post after a time of your choosing.

This is very useful for time-sensitive posts related to promotions and events, as well as for influencers posting temporary, sponsored content.
9) Choose which accounts you want to post to.
If you have multiple Instagram accounts connected to AiSchedul, you can choose to post the same post across multiple accounts.

10) Turn Auto Comments on or off.
To automatically respond to all comments left on your most recent post, check the box called “Turn on auto response to comments”. ![]() After checking the box, a box will open up wherein you can enter your own custom responses to comments.
After checking the box, a box will open up wherein you can enter your own custom responses to comments.

11) Finish by clicking “Schedule Post”

Scheduling Instagram Stories with AiSchedul:
1)Repeat steps 1-2 above.
2) click “Schedul Story”
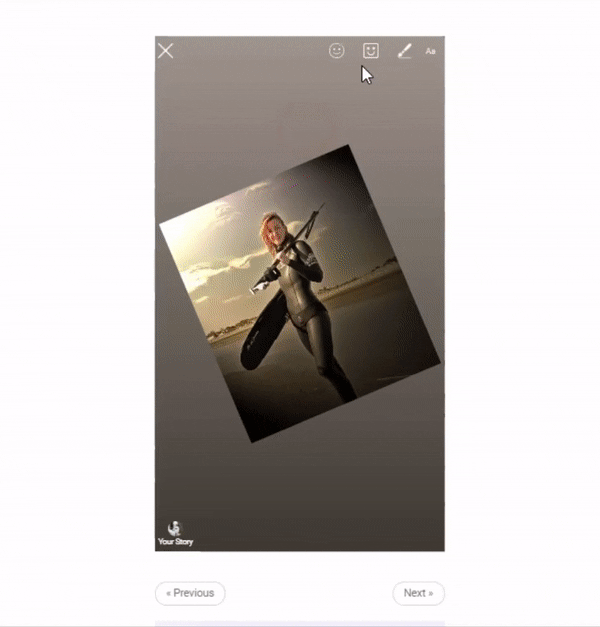
3) Add your Story.
Click the “+” at the bottom of the black rectangle and choose the file(s) you want to upload to your Story.

To avoid having to crop, make sure your files have an aspect ratio of 9:16. For example, if the width of your photo is 900 px, then the height should be 1600 px to fit into an Instagram Story perfectly.
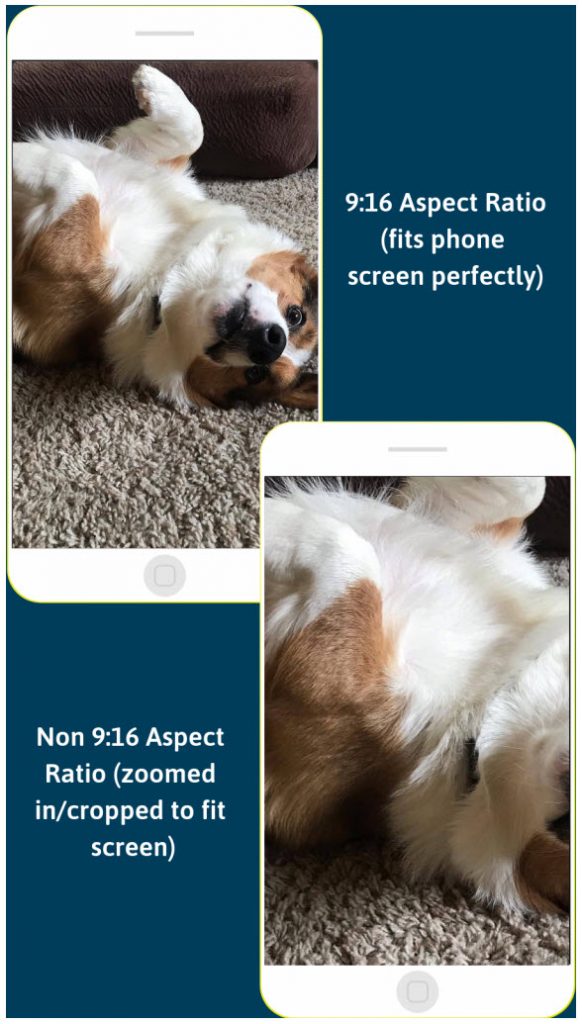
To keep things simple and make sure your Instagram stories have the best possible quality, make them 1080 px by 1920 px. These dimensions guarantee that your Stories fit phone screens perfectly and are in full HD.
4) Edit your Story.
Tag someone in your Instagram Story
Tagging someone inside of AiSchedul’s Instagram story scheduler is as easy as clicking on the “@Mentions” tab at the top of the scheduler, typing the name of the person you want to tag, and clicking on their name in the search results.
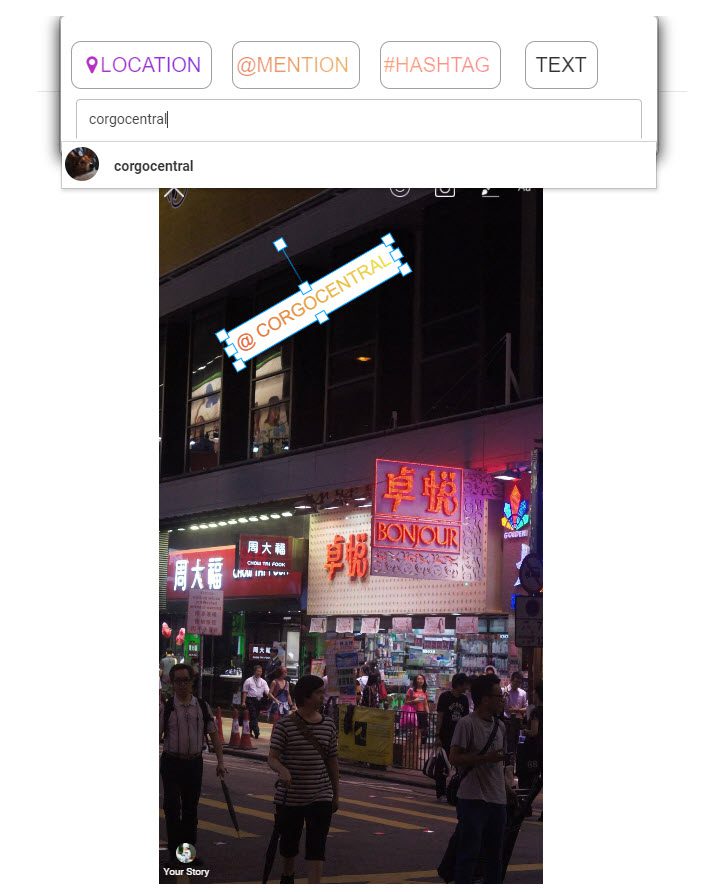
You can also tag multiple people in your Story using this method.
Draw on your Instagram Story
To draw on your Story with your mouse, simply click the paintbrush at the top right corner of the scheduler. From here, you can either click “Brush” or “Eraser.” To draw, click on “Brush,” click and hold down your mouse over your image, and begin drawing. 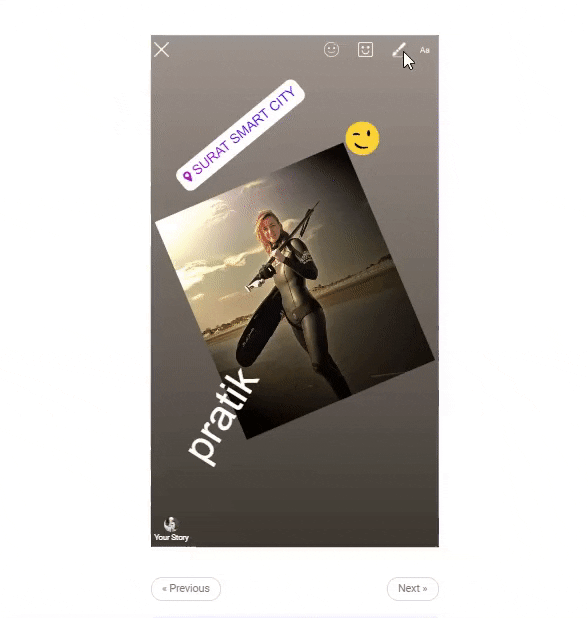
To erase, click on the paintbrush once again, select “Eraser,” and click and hold down your mouse over the areas you want to erase.
Geotag your Instagram Story
Select the square smiley face in the top right corner of the scheduler. Similarly to how you tag a person in your Story, you simply select the “Location” option at the top of the screen, search the location you want to tag your Story with and click the result. You can then move the location tag around within your Story and place it where you want.
Add emojis and type onto your Instagram Story
Adding emojis to your Instagram Stories is as easy as clicking on the square smiley face in the top right corner of the scheduler and choosing your desired emojis. Like any other element, you can then adjust the size and position of your emoji. To add text to your Stories, click on the same square smiley face, choose “Text,” write your message, and then size and place your text however you want. 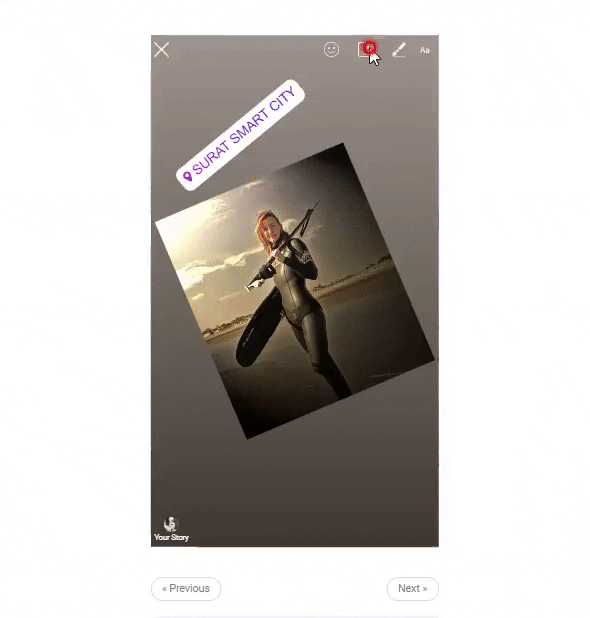
Change the background colour of your Instagram Story
If the standard grey color isn’t your thing, changing the background color of your Instagram Stories is a breeze. Scroll down past your Story and click “Change background color”. From here, you can choose your desired color.
If you change your mind and want to go back to your original background color, just click “Keep Original.”
Add a link to your Instagram Story
This feature is only available to verified Instagram business accounts with at least 10,000 followers. If you fit these requirements, you can add a link to your Instagram Story by placing your desired link where it says “Add a URL or Link (optional).”

Add questions and polls to your Instagram Story
You will also be able to add question and poll stickers to your Story from AiSchedul’s Instagram Story scheduler.
5) Choose a date and time.
6) Choose which accounts you want to post to.
If you have multiple Instagram accounts connected to AiSchedul, you can choose to schedule Instagram posts across multiple accounts.
7) Hit “Schedule Story” to finalize.

How to Repost with AiSchedul:
1) Repeat steps 1-2 above.
2) Click “Repost” and select an option from the dropdown menu.
After clicking the button, you will have four options, you need to choose how you want to repost. You can repost content by hashtag, location, a specific URL and username.

3) Find the post you want to repost.
Hashtag
To repost posts using specific hashtags, type what hashtag you want to take your post from and click “Show Posts”.

Once you find a post you want to repost, click “Repost” under that post.
Location
To repost posts tagged with a specific location, type the location into the search bar and click “Show Posts”.

URL
If you know the exact URL of the post you want to repost, paste it into the search bar and click “Show Posts”.

Username
To repost posts uploaded by a specific Instagram user, paste the name of the user you want to repost and click “Show Posts”.

Regardless of the targeting option you choose, when you click “Repost” under any post, a screen will then pop up asking you to fill in the regular information you normally would when scheduling a post (hashtags, caption, date and time, etc.) The only difference is that AiSchedul will automatically fill in the caption of your post with the caption written by original poster. If you want to change this caption, simply erase it and write your own.

AiSchedul will also automatically add a tag to your caption with the original poster’s name.
Wrapping up
A quick recap of why you need to schedule Instagram posts and Stories:
1) Save time and manage your posts and Stories from your desktop
2) Grow your Instagram faster
3) Create higher quality posts
4) Find the best hashtags for your posts
5) Create better captions
6) Post across multiple Instagram accounts at the same time
7) Make your Instagram flow better
8) Enjoy more freedom
Get all these benefits and more by using AiSchedul – the best free Instagram scheduler around. Get AiSchedul for free by clicking the button below!
Do you any other free tools/ways to to schedule post to Instagram? share your idea in the comments below.