Page Contents
Ever wanted to change your personal information on Instagram but didn’t know where to look for the settings? In this comprehensive guide, I will tell you how to change your email on Instagram on all devices including Android and iOS devices and PC. Then, for further info, I will discuss how to update other info like birthday, phone number, and gender. Now, are you ready to know more?
So, without further ado, let’s jump in.
How to Change Email on Instagram on iPhone & Android?
Are you looking to change your Instagram Email? Don’t worry because the process is pretty straightforward. ّFirst, update your Instgaram app and then, follow these simple steps to see how to change the email linked to Instagram:
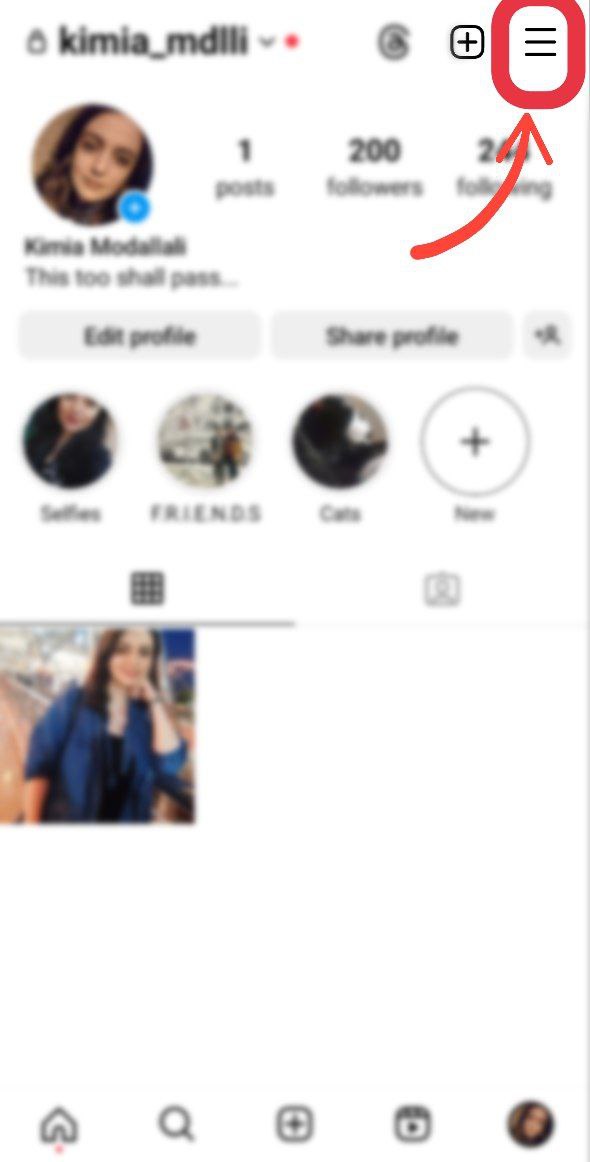
1. First, tap your profile picture in the bottom right.

2. Then, choose the hamburger menu in the top right of the screen.
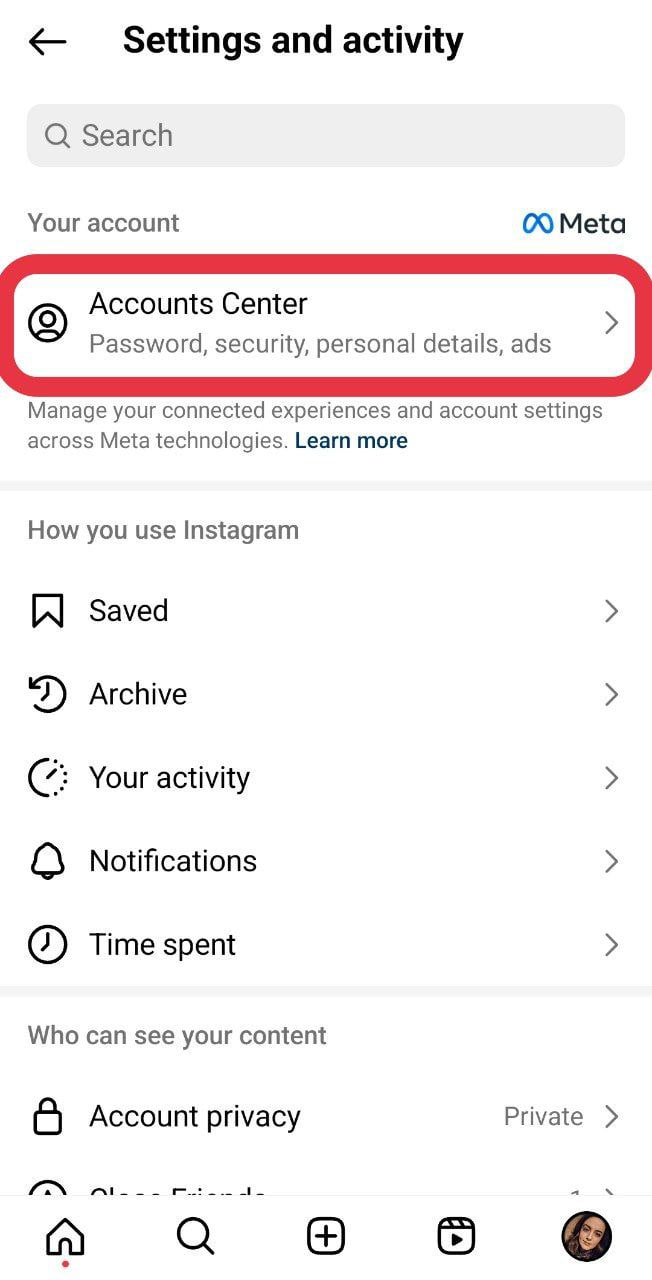
3. Then, choose Accounts Center. (If Accounts Center is still not available to you, skip the steps and read steps 6 & 7)
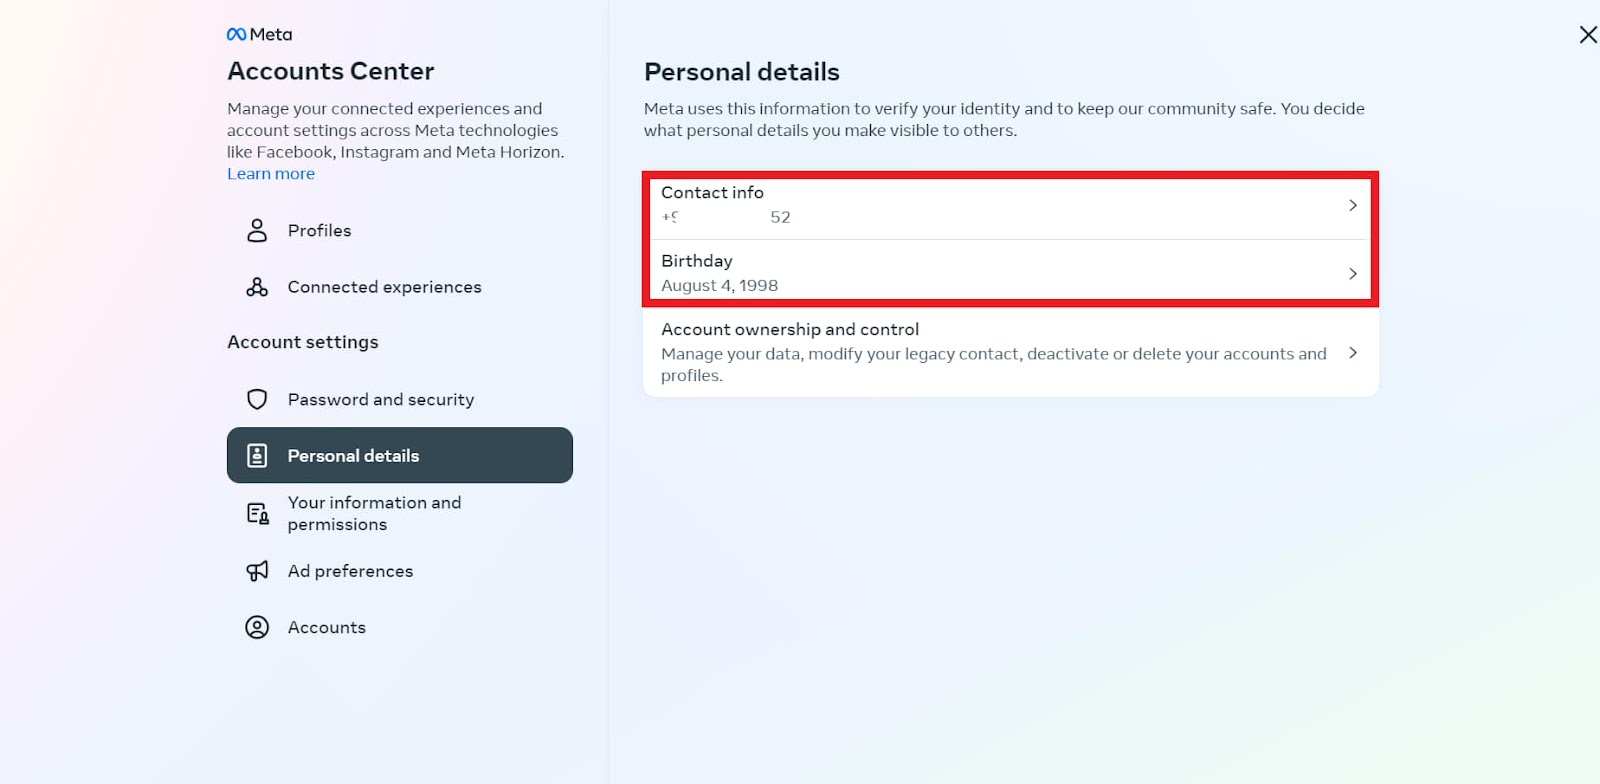
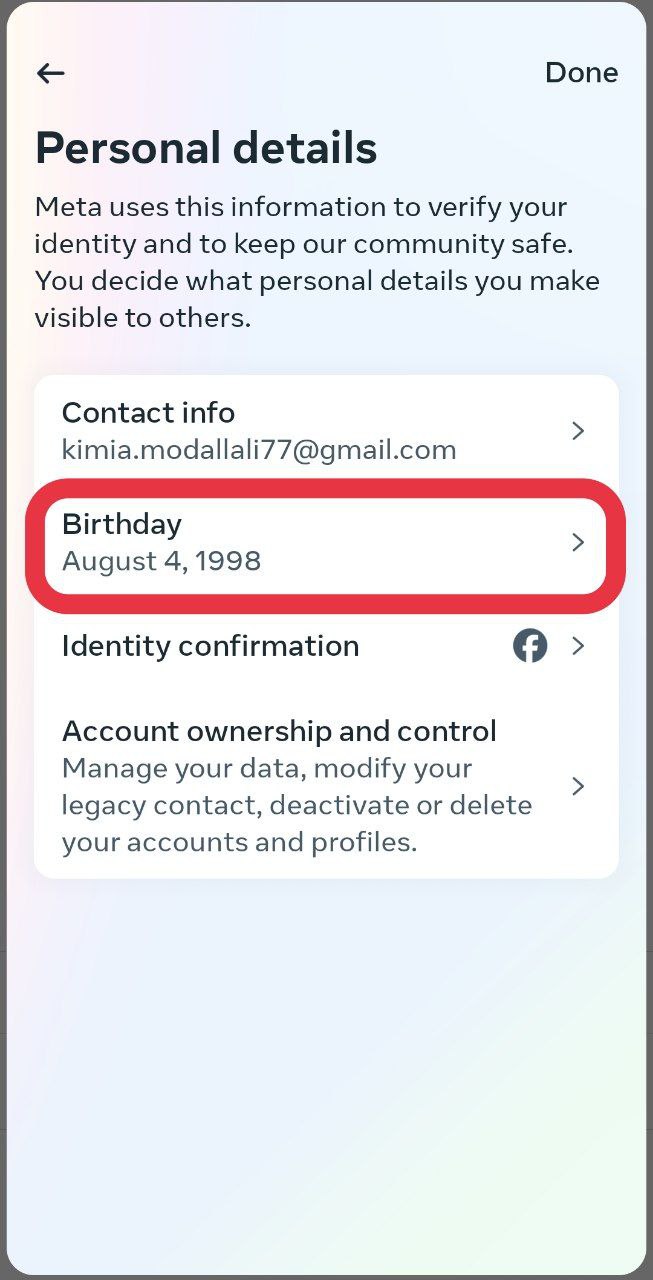
4. Scroll down a bit and choose Personal details.
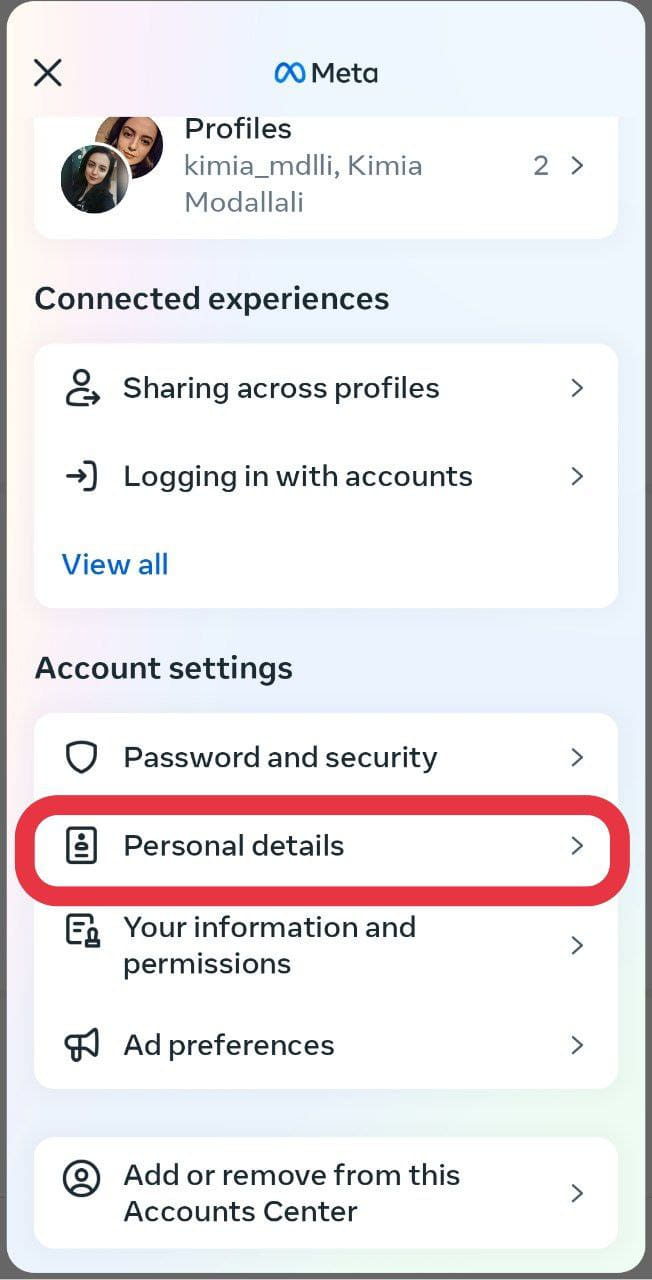
5. Finally, you can tap Contact info and change your email.

6. If Accounts Center isn’t available to you, tap Edit profile from your profile.

7. Then, choose Personal information settings.
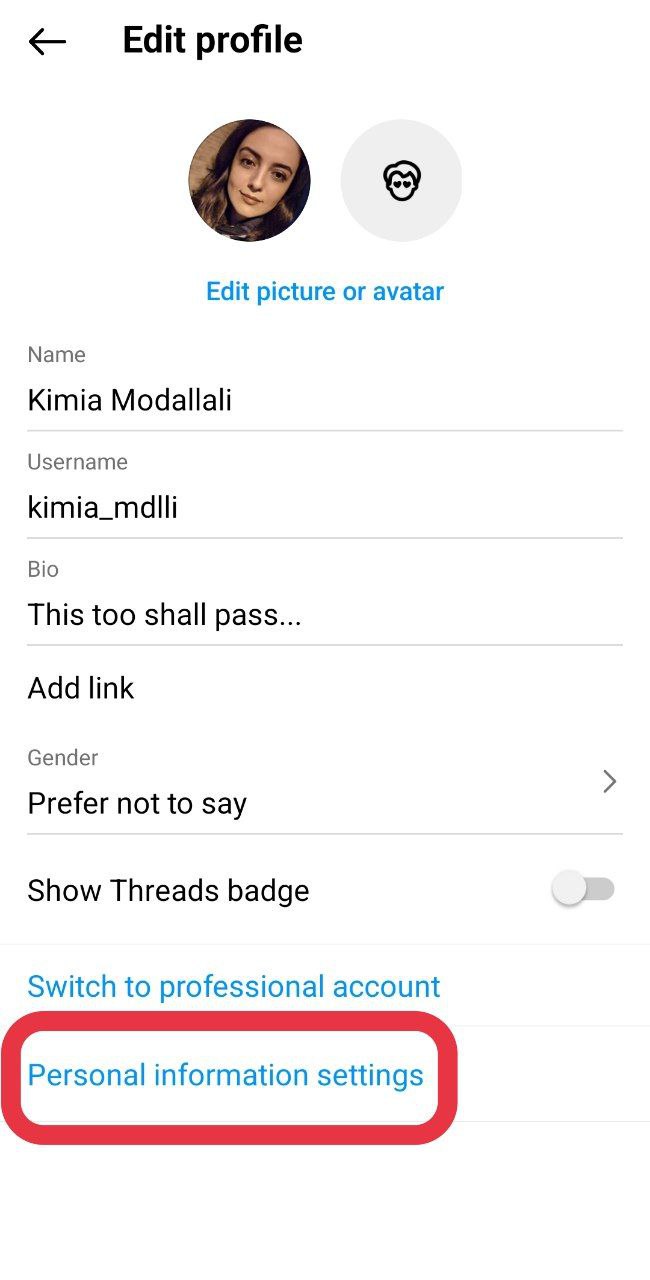
Here, tap Contact info and change your email address.

How to Change Instagram Email on Desktop?
Changing your Instagram login email on PC is somewhat the same as updating your email on your phone. Here’s how to how to change your email on Instagram on PC:
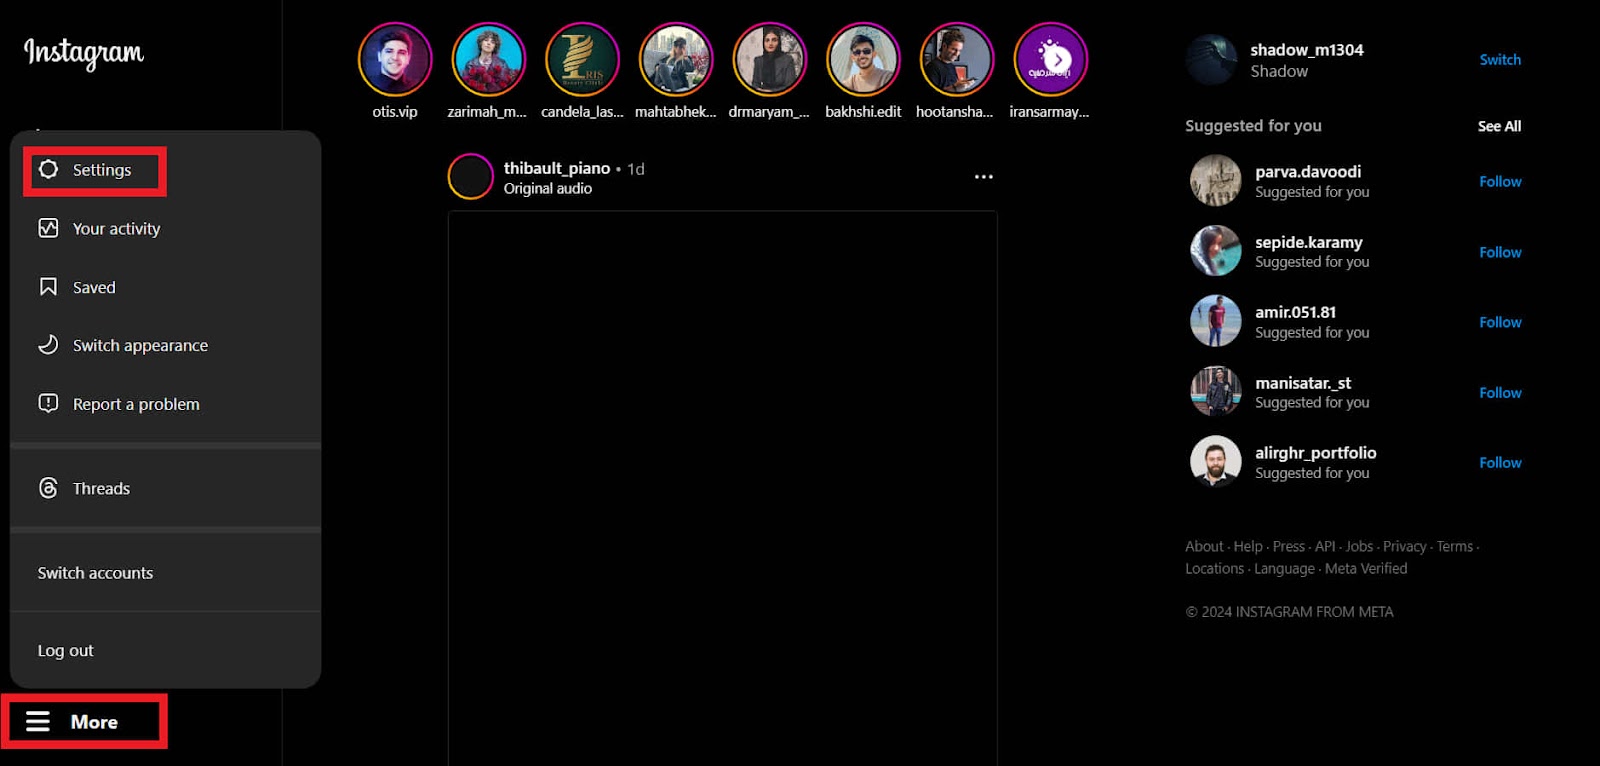
1. Open your Instagram and choose More in the bottom left and then click Settings.
Note: Here, you can change your gender as well from the Edit profile section.
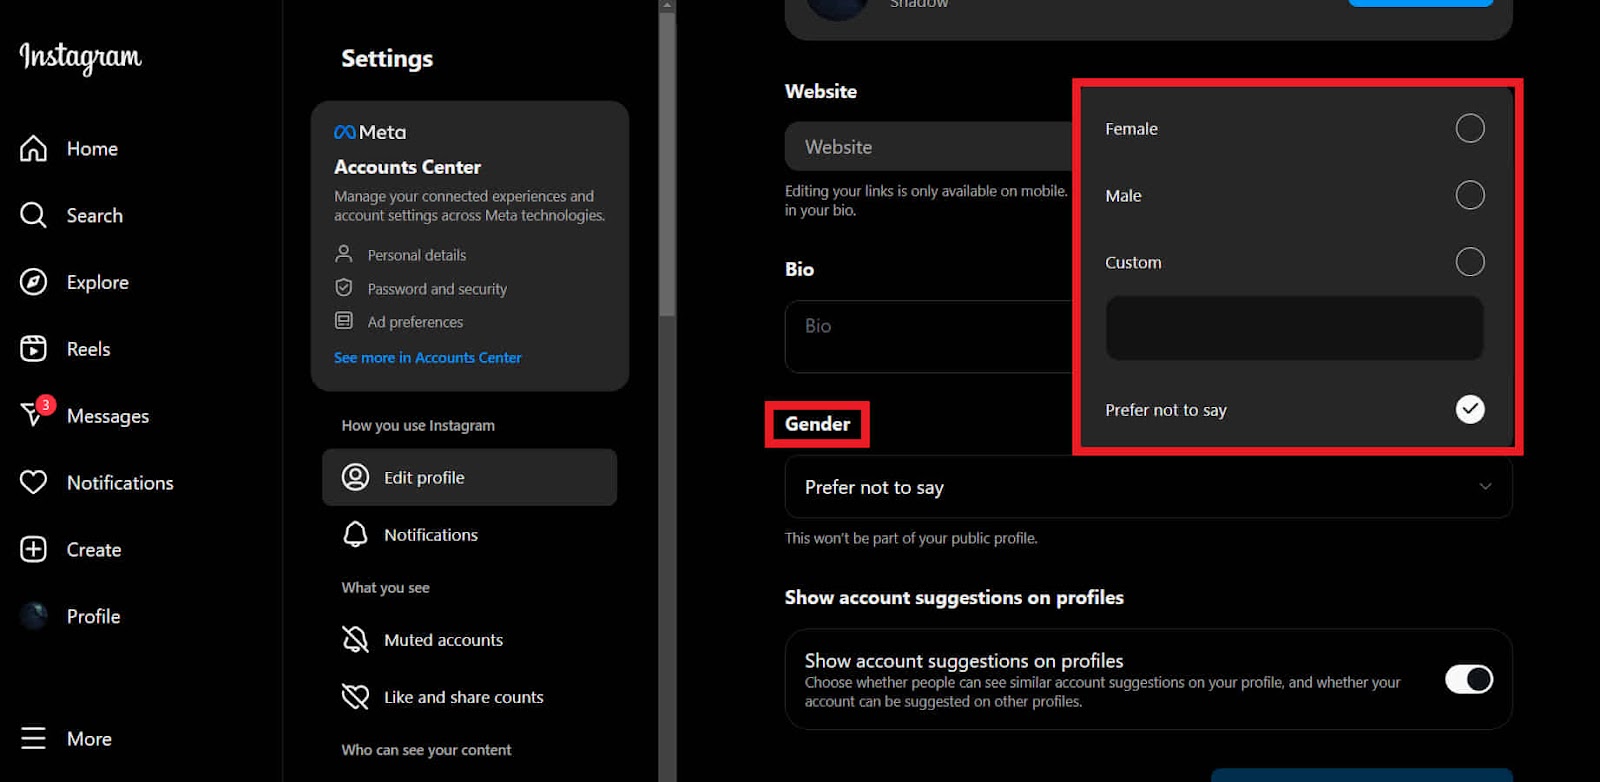
2. Next, choose Accounts Center and select Personal details.

3. Now, you can update your contact information (email, phone number, and birthday.)
How to Change Other Personal Information on Your IG Account?
There is other personal information you may want to change every now and then. For instance, you may have changed your phone number and want to update your number on Instagram as well. Or maybe you have entered the wrong birth date or want to change your gender status from ‘Prefer not to say’ to Male, Female, or Custom. So, here’s how to update this info on Instagram.
#1 Phone Number & Birthday
To change your phone number and birthday:
1. Access Profile Settings: Tap your profile picture in the bottom right corner, then the three horizontal lines in the top right.
2. Go to Accounts Center (if available): If you see “Accounts Center,” tap it, then select “Personal Details.”
Note: If “Accounts Center” isn’t available, skip to step 4.
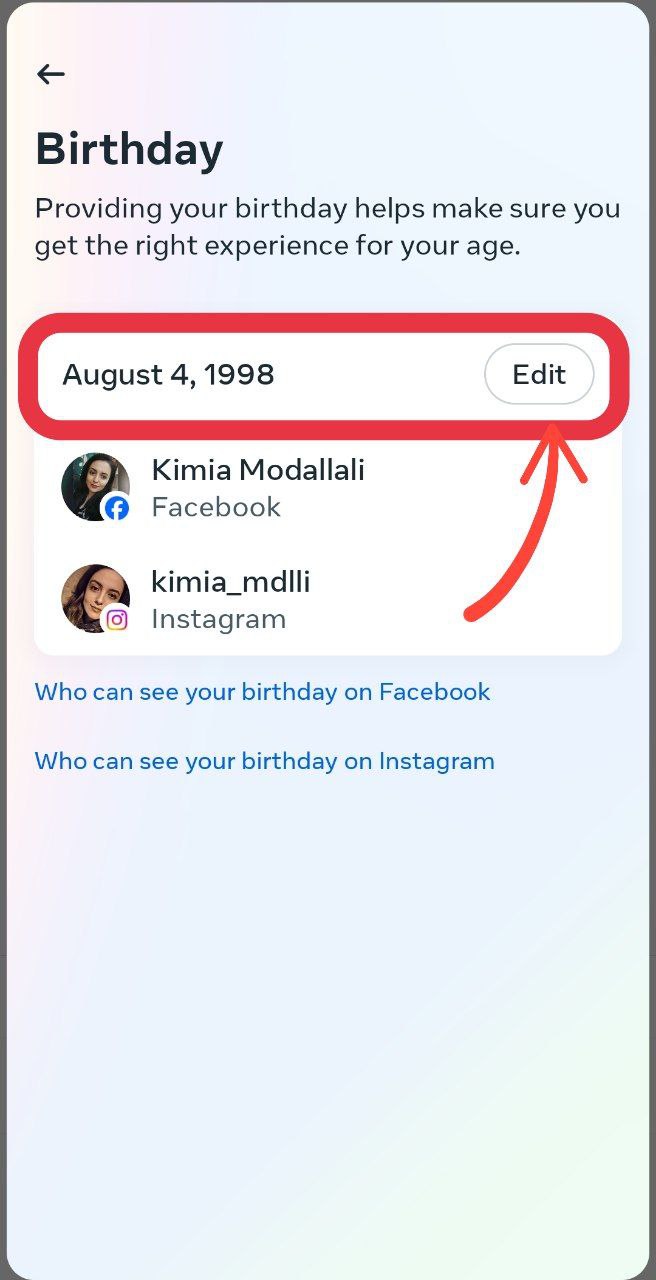
3. Update birthday and phone number under Contact Info: To change your birth date, you can tap Birthday.
Then, tap Edit to change the date.
Within “Personal Details,” tap “Contact Info”.
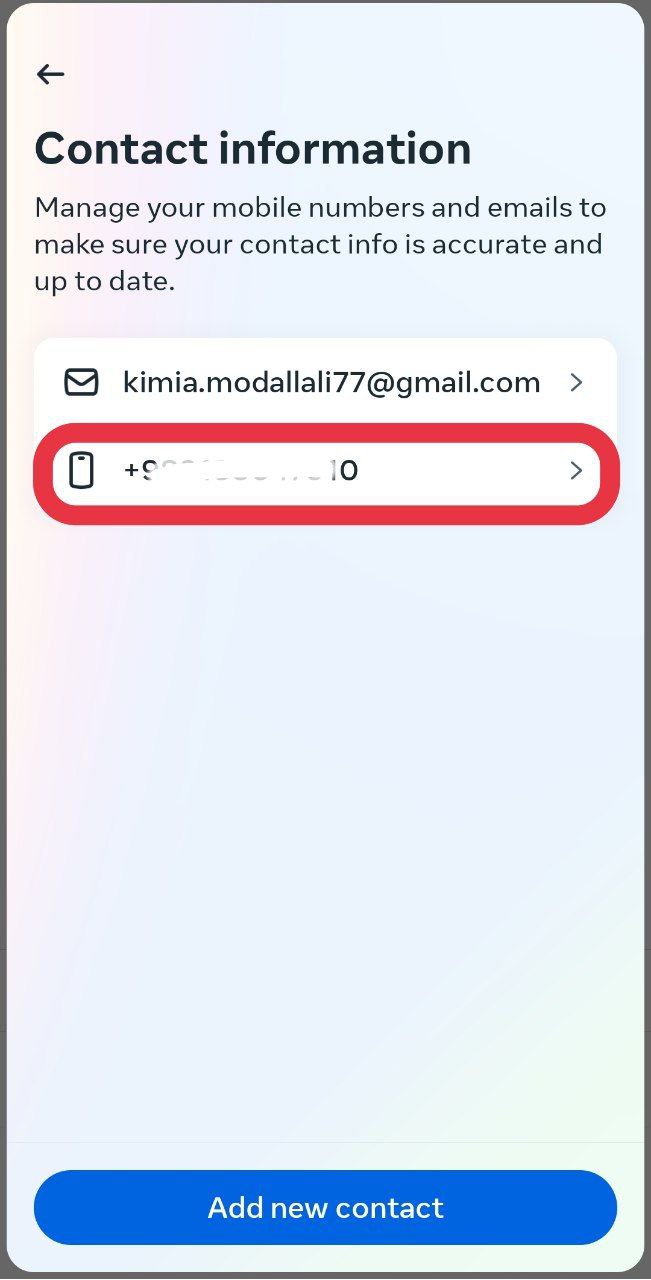
Here, you can follow the prompts to change your phone number.
4. Alternative Method (if no Accounts Center): When accessing your profile, tap “Edit Profile” instead of “Accounts Center” (step 2), then look for “Personal information settings” or scroll down to find the “phone number” or “Birthday field. You can update your info here as well.
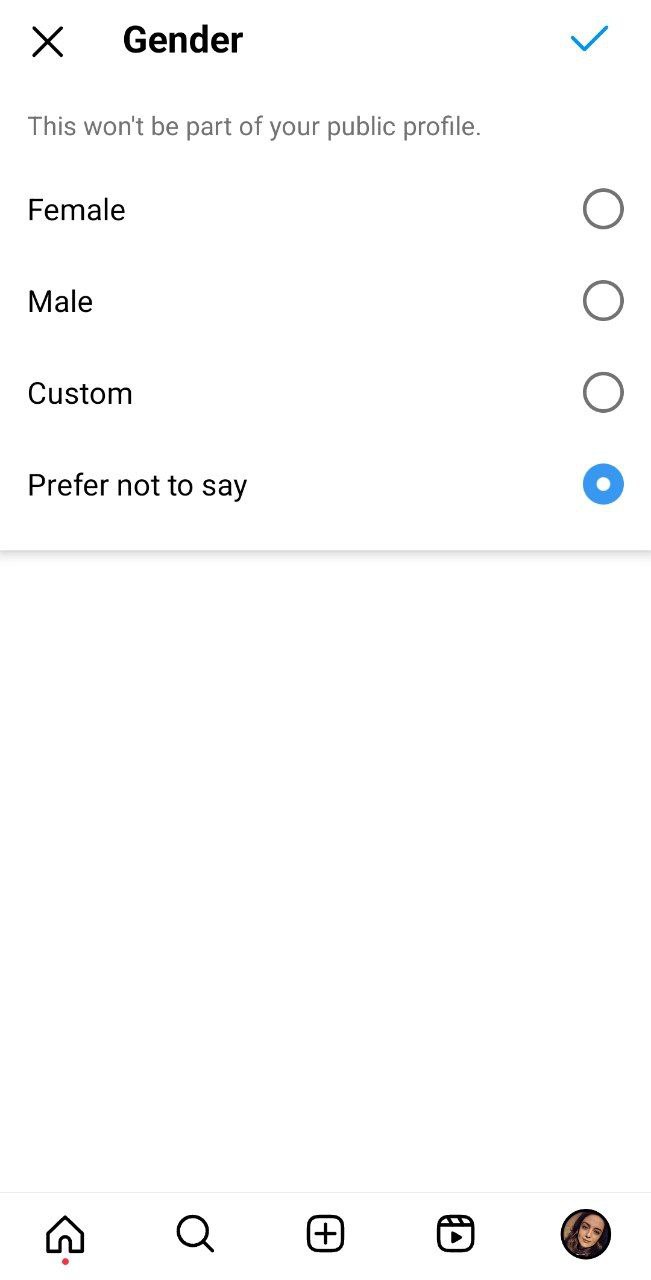
#2 Gender
Now, to access settings related to gender, follow the steps below:
1. Open your Instagram and go to your profile. Then, tap Edit profile.

2. Here, you can change your gender to Female, Male, Custom, or Prefer not to say.
Last Words on How to Change Email on Instagram
In this guide, I tried to provide you with clear instructions on how to change your login email on Instagram. Additionally, I’ve included essential tips for updating your personal details, such as your birthday, phone number, and gender preferences. I hope this information will be practical and helpful for managing your Instagram account.
FAQs
Now, let’s answer some frequently asked questions regarding changing email on Instagram.
1. How to Add Email to Instagram Account?
In short, tap your profile picture (bottom right) > hamburger menu (top right). Then:
Accounts Center (if available): Tap it > Personal details > Contact info (change email).
No Accounts Center: Tap Edit Profile > Personal info settings > Contact info (change email).
2. How to Change Email on Instagram Business Account?
Here’s how to change the email address on your Instagram Business Account:
For Accounts Center Users:
Tap profile picture (bottom right) > menu (top right).
Tap “Accounts Center” > “Personal Details” > “Contact Info” (change email).
For Users Without Accounts Center:
Tap profile picture (bottom right) > menu (top right).
Tap “Edit Profile” > “Personal information settings” > “Contact Info” (change email).
3. How to Change Your Email on Instagram Without Logging in?
Unfortunately, it’s not possible to change your Instagram email address without logging in to your account. Instagram prioritizes account security and requires verification through your existing login credentials to modify this information.
4. What Happens If I Change My Email on Instagram?
When you change your email on Instagram, several things happen:
1. Verification: Instagram will send a verification link to the new email address to ensure it’s active and accessible.
2. Security information: Your old email address will receive a notification informing you of the change. This is a security measure to alert you in case the change is not authorized.
3. Login credentials update: Your new email address becomes the primary contact for login and account recovery purposes.
4. Account recovery: In case you forget your password in the future, the password reset link will be sent to the new email address.
5. Communication: All communications from Instagram, including security alerts and notifications, will be directed to the new email address.